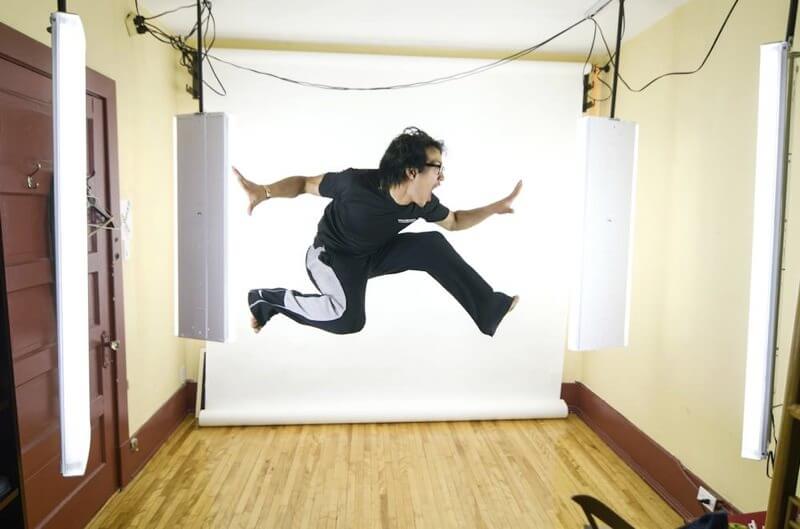
TLDR: For those of you too lazy to read the entire blog post, feel free to scroll down for a list of all the pieces I had to buy

I recently decided to inspire myself from a video I saw posted over at DIY Photography where I saw a fellow photographer by the name of Joe Edelman actually set up a bunch of fluorescent lights on rails and tripods to have a pretty effective and slick home studio.
Rather than Do Things Myself like I was supposed to, my three step plan kinda went something like this:
– Buy the parts
– Get my dad to design the setup
– Get a friend to help drill, dremel and screw things in.
Not a bad plan eh?
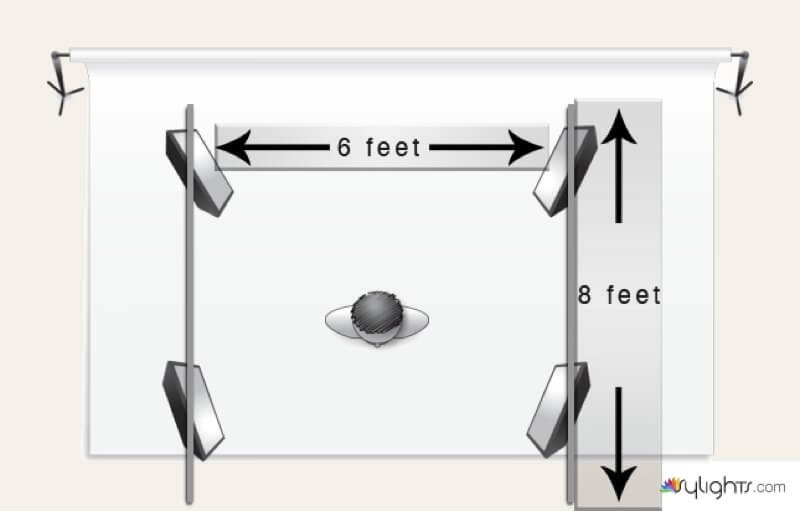
The first things I grabbed were a bunch of four light ceiling fixtures. Although there were all sorts of choices (2, 4, 6, 8…) I felt that the fours would really give me a great balance of power and versatility. The Lithonia brand also happened to be the cheapest which suited me just fine! Rather than have a couple of them floating on light stands, I wanted the entire setup to be on rails since my room is relatively small (10 ft x 10 ft) and I really didn’t want to loose space because of tripod feet sticking around.
From there, I grabbed a pocket door kit (also known as Bob in the video) which was substantially more heavy duty than the closet door kit that Joe recommended (better safe than sorry!) with the accompanying 8 foot rails.
Although in theory, simply screwing the closet door kits straight into the ceiling fixtures should have solved all of our issues, my ceiling happens to be pretty high which significantly complicated our lives. Since I didn’t want to be permanently standing on a pedestal everytime I shot a video, I had to figure out a way to lower the entire setup economically.
Thankfully, my dad was readily available for consultation and came up with the brilliant idea of connecting a couple Galvanized 3/4″ Floor Flange to some plastic threaded plumbing rods. Of course as luck would have it, the pocket door kit
was only compatible with a 1/2″ flange so we had to buy a bunch of 3/4″ to 1/2″ adapter
. What a pain.
Regardless, once all the parts were purchased, all that remained was to take a dremel and a friend to poke some holes into the ceiling fixtures
!
I’m not quite certain what I did wrong but I suspect that our canadian prices here are slightly hire than the US ones because my home studio cost me far over the estimated 200$ in Joe Edelman’s version.
Here’s my breakdown:
4x four light ceiling fixtures = 300$
20x 40W T12 48″ 6500K Light Tubes = 100$
2x pocket door kit = 20$
2x 8 feet alubminum rails = 30$ (sorry no link)
Screws, Nuts, Bolts, Flanges, Rods = 100$
For a grand total of 550$ + 15% taxes (go Quebec!) = 630$
Add on the cost of the fancy white backdrop + three roller wall mount and I hit 750$… slightly over the budgeted 200$…!
But honestly, the ease to actually pull things down at the flick of a light switch and just be ready to shoot within 5 minutes made it all worthwhile. Total time to put the whole thing together from concept, shopping to ready to go? 3 days.

–
So the pros and cons of my setup are:
Pros:
– Zero setup time
– Takes up literally no space at all
– Flexible lighting (two degrees of freedom (back/front and rotation))
– Silent, does not heat up
– 6500K Daylight
– No flicker (even when shooting at higher than 250th shutter speeds. Don’t ask me why, I’m not quite sure but I’m going to guess it has something to do with the “flicker free” that’s marked on my box of fluorescents)
Cons:
– Only two degrees of freedom (cannot be angled up or down and fixed height)
– Even lighting from all directions. No efficent way to dim a set of fluorescents.
– Slightly expensive.
Overall, I’m pretty happy with what I have but I definitely plan on upgrading it in the near future with additional light banks and perhaps a dedicated variable height ceiling rail system… maybe after my Von Wong Does Europe tour!
