I had the opportunity to shoot the Trio Dinicu while touring through LA in December. They wanted an ultra clean image to portray their band and had chosen the Disney Concert Hall as the best possible location. Like most starting bands they did not have a proper location budget which meant that we would have to light them up… guerrilla style using nothing more than a couple speed lights, Elinchrom Ranger, and a white t-shirt to act as a diffuser.
Since I didn’t have anyone covering video that day, I took the time to throw together a photoshop deconstruction instead for you guys! Sorry for the uneven squinty eyes and exhausted expression, turns out that preparing these things take up a lot more effort than I had predicted and it was 4:30 AM before I actually finished putting the video together!
(Listen to the awesome piece without my terrible narrating voice as you scroll through this blog post!)
Guerrilla Lighting Diagrams:
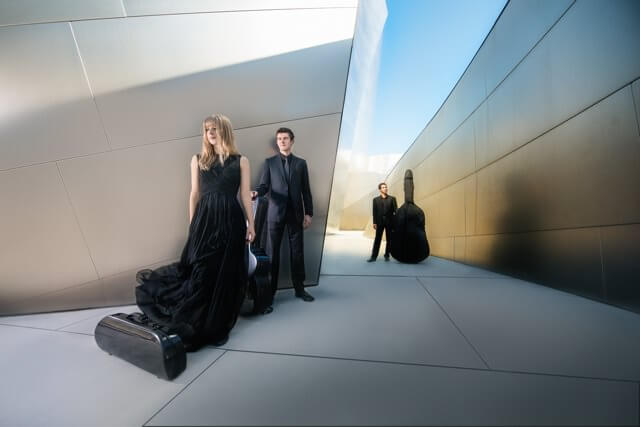
For this first photograph, I wanted to tell a simple story of Luanne (violin) and Tommy (guitar) waiting for Marlon (bass), the 3rd and newest member of the group to join them. Since we were shooting relatively early in the morning in a very sheltered environment, we didn’t have very much sun to deal with which meant an overall very even and beautiful light falling across the entire image.
This also meant though, that things would be looking a little flat which is not something I normally like in my images. Since we didn’t have any soft boxes or umbrellas at our disposal, I popped the Elinchrom Ranger that Roger Yu had graciously lent to me for the day through a white t-shirt we had brought to cast a soft directional light straight to make Luanne and Tommy pop out just a little bit.
Of course, to make things just a little bit more surreal I employed a small little trick that I like to use to add movement to an otherwise static scene by having Lani toss the dress and scooch out of the picture as fast as possible.
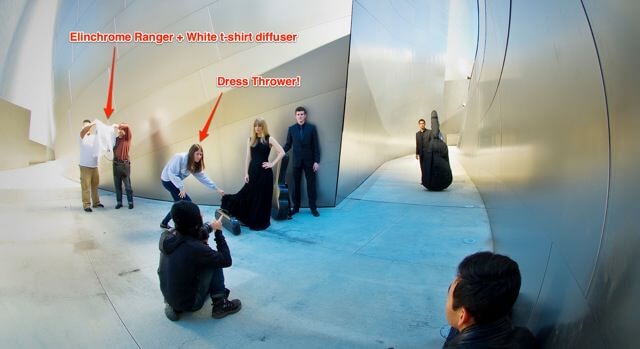
Photo by URFotogenik
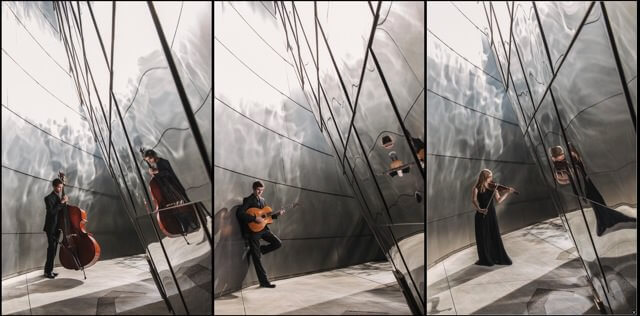
On the second series of images, we had to capture a single stand-alone portrait of each artist next to their instrument. We found this amazing little hallway of metal plates that would be just perfect. By this time, the sun had risen just a little bit higher and was already starting to bleed into the top of our image burning out the top of the reflective surfaces but also creating some amazing reflections in the hallway of mirrors.
Once again, to add just a little bit of a spotlight onto our protagonists, we used the Elinchrom Ranger to its maximum 400 watts of power and had it simply bounce off the back wall of this perfect little concave that we found. Without the concave, it would have been almost impossible to light up our subjects without having some kind of horrible reflection appearing in the image so the shots had to be framed at this perfect sweet spot.
Bouncing the light into a wall meant that we were essentially improvising one massive soft box that would not only cast a lovely highlight onto our subjects but also a light that would have just a little bit of depth thanks to the imperfections and variety of materials that were in the wall.
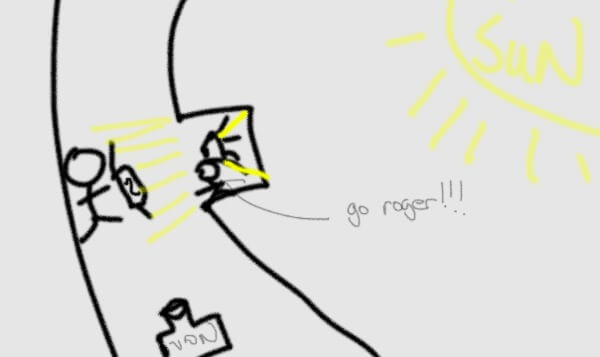
(pardon the drawing skills)
For the final shot that we took, I placed myself precariously over the edge of this super awesome drop that we found and shot our 3 protagonists standing in the centre. Lighting was quite tricky for this one as we were trying to not only light our 3 subjects but to also cast a nice fancy glare on the top of the metal structure which helped to add depth to the final image.
Though I had initially planned on using three flashes, we finally settled for having our Elinchrom Ranger diffused through our hero white t-shirt as the main backlight and a separate speed light to cast the nice upwards “highlight” that you see bleeding across the image. No light mods needed!
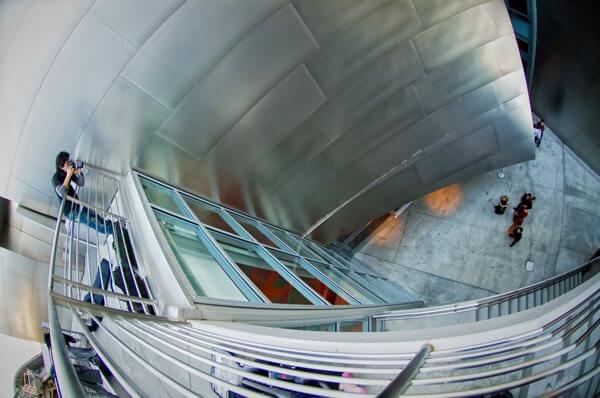
Photo by URFotogenik
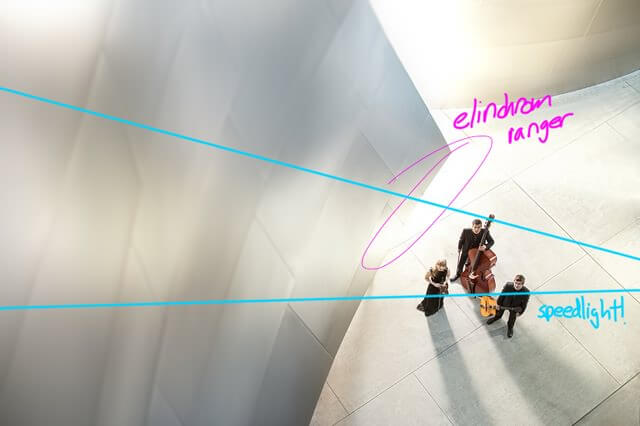
Final Shot:

Photoshop Deconstruction
As mentioned earlier, the best way to smooth surfaces over (IMHO) is to use something known as the Frequency Separation Technique. Never heard of it? Throw it into google and you’ll find a bazillion different examples and uses for it. What it essentially does is separate a single file into two separate layers: A texture layer and a colour layer. This means that you will be able to smooth tones without affecting texture in an image.
Too lazy to search for one? Check out Sarah Kiesling’s detailed tutorial (specifically targeted to beauty retouching)here. She has a far sweeter voice than mine and goes into some great details you might enjoy.
The reason I use this technique is to smooth out distractions in an image. Too often, our eyes are drawn to imperfections in an image which I feel can greatly weaken your image. Of course, like all things, I recommend that you “perfect” things in moderation as the final result is still supposed to be a photograph!
Always be certain to remove all larger distractions using the clone/heal/patch tool before you perform the frequency separation technique.
I’m going to simply write out the steps used in the Youtube video as a sort of text support for those of you attempting to reproduce the technique.
- Step 1:Duplicate your layer twice
- Step 2:Apply Gaussian Blur on the image. The Gaussian Blur value you choose actually defines how much detail will fall into the “tone” layer and how much falls into the “texture” layer. Play around with it a bit, you’ll see it soon enough.
- Step 3:Image –> Apply Image –> Onto the Blurred layer –> Subtract | Scale: 2 | Offset: 128 –> Transform layer into a blending mode of “Linear Light” and make sure it is above then blurred layer.
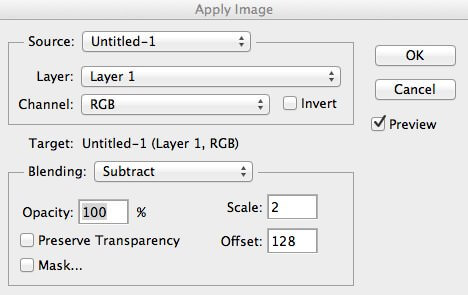 *note: I like to group these two layers together so that they’re easy to toggle on and off for a quick “before and after”. Highly recommend you do the same!
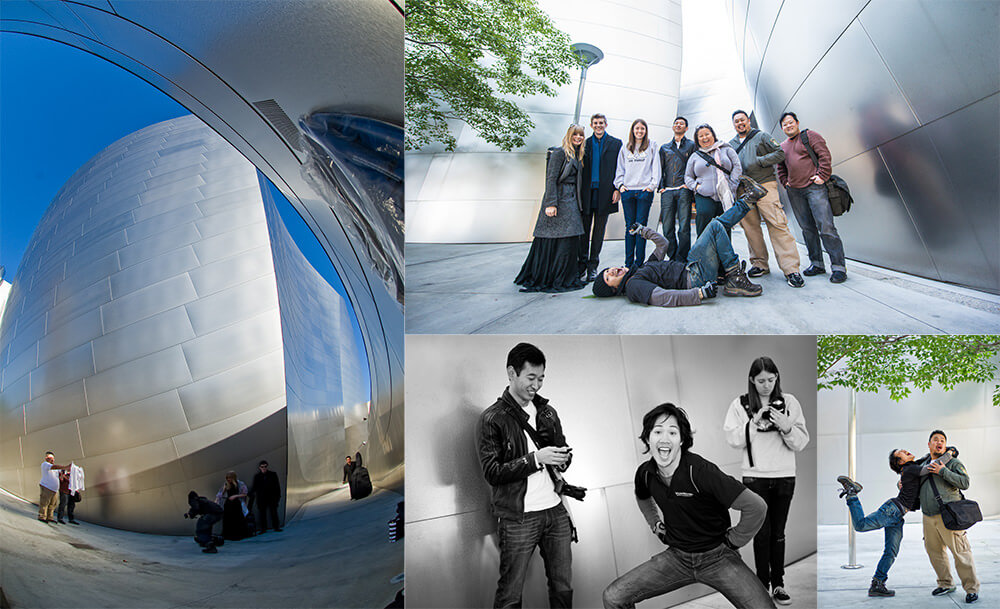
 - Step 4: Play around! Either paint a “tone” on a layer between the texture and colour layers to smooth things out… or clone/heal/patch directly on the texture layer!Make sure that when you clone or heal textures that your brush is set onto “current layer”. Failure to do so will result in a completely wonky image.Hopefully this has helped you guys just a little bit! Let me know what you thought of this video and leave any comments/questions in the bottom :)Thanks to everyone who came by that day to help out 🙂
Announcements:
- Are you a long time fan? Tell me about yourself and sign up for my newsletter! I answer each one personally and would love to get to know you! –> http://bit.ly/10ZAuOF
I will be giving a CRAZY 2.5 day workshop in London, UK on the 22/23/24th of March… Check it out HERE

