By now you’ve probably heard of a brand new device that has been released called The Light Blaster. I had the chance to play with this nifty little device ahead of time (gotta have some perks for blogging weekly!) and even be part of the very exciting launch about 2 weeks back. I didn’t actually get the opportunity to talk much about the photoshoot itself so I figured that I’d write about how I lit the shots from the shoots while providing a general review of the product. FYI – this blog post is not sponsored.
For those of you who hadn’t had the chance to see the video, here it is:
Note: Those fancy transition effects? Done with the help of Rampant Design Tools Style Mattes !
About the blaster
So what is the blaster? Long story short – it’s pretty much a projector that uses the focusing of a lens and power of a speedlight to project whatever you want, wherever you want. Though that may not sound exciting in itself, when you start thinking of it as more of a light shaping tool rather than a projector exciting possibilities open up.
What possibilities you say?
Well in my case, I used it to transform my flat wall into something with depth by projector a simple abstract pattern. I used it to texture the smoke to create exciting streaks.
But what else could you do? You can create a spotlight since you can suddenly focus your beam of light into specific shapes, you could generate patterned shadows (think simulated sunlight streaming through the trees instead of using david hobby’s plant trick), custom backdrops, textures… !And just imagine if you had two!!
Setting the blaster up
When I first prepped for my blaster shoot with model Jen Brook, I had never used the blaster in the past so I actually had no idea what I was doing. We tried on a variety of different lenses to see what effect it would have on the background.
The result? Wider lens = wider background (duh) Bigger aperture = brighter projection (depth doesn’t matter on a flat wall)
Simple physics.
What was a little harder was actually focusing the projection. Though I could have just shone a flashlight into the blaster and carefully focus, I felt lazy and just snapped away while slowly tweaking the focus until it was approximately where I wanted it to be. Waste of battery, but no worries. I had rechargeables.
To make my life even easier, I had my PocketWizard TT5s and AC3 zone controller to remotely control speedlight power from a distance without having to run back and forth. Double win!
Creating the first shot
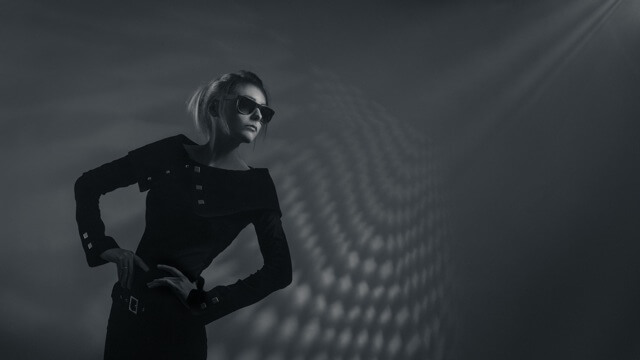
Once the background was set, all that remained was to light my subject without diluting the background. This meant that I had to carefully control my lights using a combination of snoots to not only light Jen, but slightly separate her from the background.
This is more or less what the light looked like:
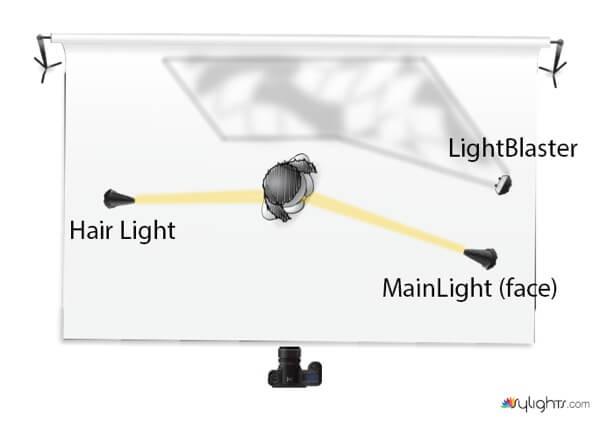 Quick lighting tip:
Having your model look directly at a light source, even a harsh one will ensure that you don’t end up with unpleasantly placed shadows. Don’t trust me? Grab your friend and get them to look directly at the sun and see how the shadows fall!
Creating the second shot
While shooting the first shot, I noticed that the smoke machine I had running made some really exciting streaks that I had never been able to achieve before with a speedlight so we decided to toss Jen in front of the blaster and have her in the centre of the beams of light.
This time around things were even easier, no focusing was quite required, all we had to do was time things properly so we had enough smoke to capture the streaks… but not enough to drown her.
Changing the orientation of the blaster (horizontal/vertical) obviously made a difference in how the streaks were coming through so finding that optimal combination was once again, trial and error.
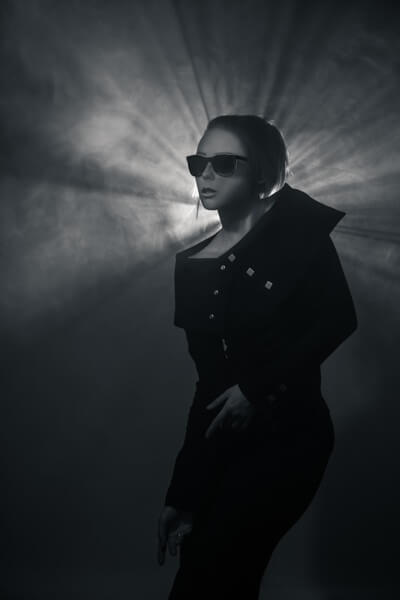
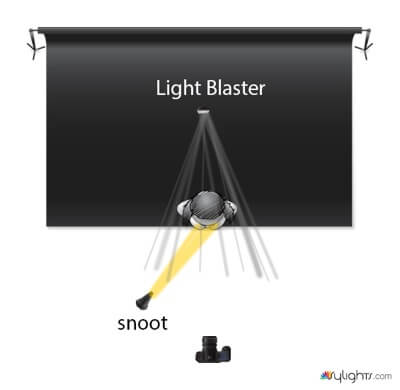
Lighting once again was just as simple, a simple speedlight in the foreground with a snoot to light up her face.
Fun! So what’s the blaster really like?
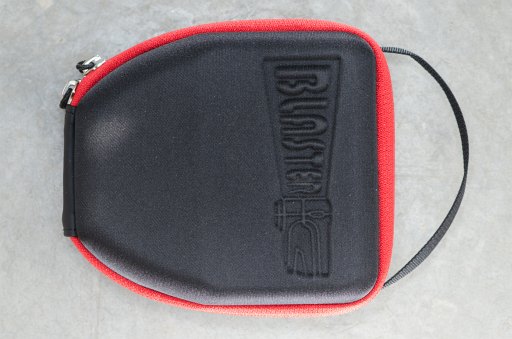
Well, the blaster comes in a sexy red hard-shelled case that is quite well built and nicely detailed with the blaster logo ensuring that your device stays well protected in the bag; Not that it really needs it as the blaster is made of a nice solid piece of plastic that feels sleek and smooth in the hands.
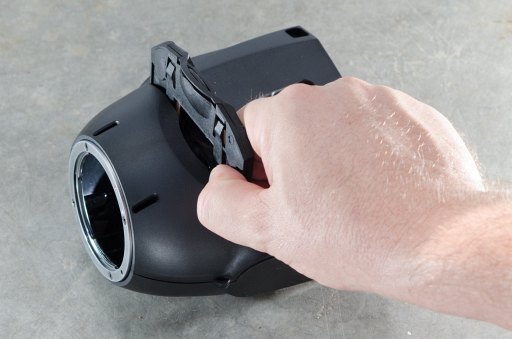
The slide holder itself slides smoothly into place and is specifically designed to hold the various creative kits available so no complaints there either.
There’s a 1/4″ thread for you to screw a light stand in that’s well placed for the centre of gravity and works perfectly.
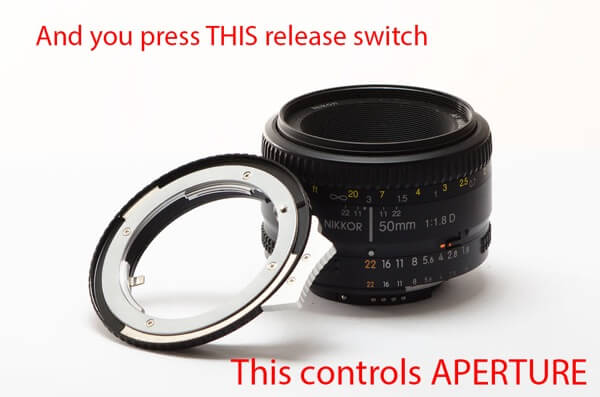
From a build quality perspective, the one piece I found a pain to use is the generic Nikon adapter. I dunno if I’m completely daft but getting a hold of which button did what was really not obvious for me (who needs instruction manuals!) so for any nikon shooters out there, here’s a little diagram to save you the trouble:
In Conclusion, TL/DR’
Overall, a product that delivers and works as it’s supposed to. It unlocks some really cool possibilities that frankly I wouldn’t know how to do otherwise. So what are the cons?
Well there aren’t many to be frank but if I were to nitpick on things I would like to see they would be:
- I wish that there was more power. I like shooting on location, not in studio and speedlights just don’t pack enough of a punch. I’m sure I could mcguyver a solution though to strap a strobe onto the blaster
- I wish there was autofocus. Focusing is a pain in the butt and I’d love to have an autofocus edition of this… (but not pay the price difference for it.)
Who would I recommend this to?
While I can think of a whole bunch of people who would enjoy this I find it easier to instead to name people that I think would NOT like the Light Blaster:
So people who:
- do not know how to use off camera lighting
- do not own an extra lens or speedlight
- hate setting things up and want to run and gun
- are looking for something natural… Nat-geo style
- don’t like fiddling with new toys
- do not have an extra 100$ to invest in photographyThen the blaster is not for you.
Besides that… I can’t really think of anyone that can’t find a use for it… weather it’s weddings, family portraits, environmental shots, fashion, products… I think that anyone can definitely find a use for the Light Blaster. What that is, is really limited by your imagination.
If you guys are curious enough by the end of this post to go grab one and try it out, head over to this link here. Once again, I am not paid to write this, nor am I receiving any sort of affiliate sales.
THE GIVEAWAY!
And finally the moment you’ve all been waiting for. I actually have an extra blaster (Nikon/Canon) (+ 4x creative kits) to give away so if you happen to be one of those poor photographers that’s dying to get your hands on one to try it out, simply share this post and leave a comment on what you’d like to do with the blaster.
The one that intrigues me most wins! Oh, and I’ll also feature the final results on this blog when the shots are ready 🙂
- Model: Jen Brook
- Assistants : Julius Adarna
- Cameraman: Julius Adarna
Announcements:
- Just got the most amazing tripod ever from 3 legged thing. Check it out.
Upcoming workshops in Vancouver, and Edmonton!! Check them out here
Special Gear used:
- Nikon D800E: B&H | Amazon
- Nikkor 24-70mm f/2.8
- Pocketwizard Flex TT5 |Pocketwizard AC3
- Light Blaster
See what else is in my camera bag when I travel!
