Video by Siva Shanker
It’s kind of fun to do the impossible. – Walt Disney
Every image that I create consists of a series of challenges to overcome. Shooting in an underwater shipwreck was no different, it just happened to have a couple more that had to be worked through. 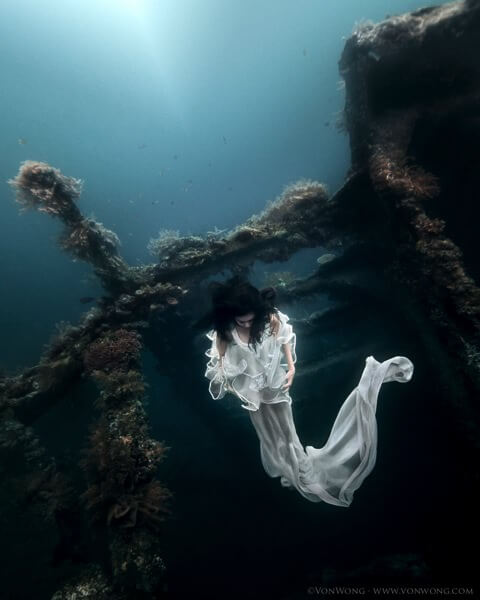 Nikon D90 | 12-24mm f4 | Aquatica housing | ISO 400 – f/4.0 – 1/200th sec Conceptualizing On the first day that I arrived in Bali and sat down with Chris to discuss logistics, I immediately realized that I was going to have to present him with something tangible to explain to him what was going on in my mind. Unfortunately, as someone who didn’t yet have his diving license yet, there was no possibility of scouting the location ahead of time which meant that I was going to need to find some other way. Though I began by launching a very typical google search of the “Tulambun Shipwreck“. A couple minutes in, I soon realized that I wasn’t getting the variety of angles I was hoping for, nor was I really getting a sense of scale. I turned to youtube, and stumbled upon this gem of a video by underwater videographer Nick Hope documenting his dive of the shipwreck from a variety of different angles.
 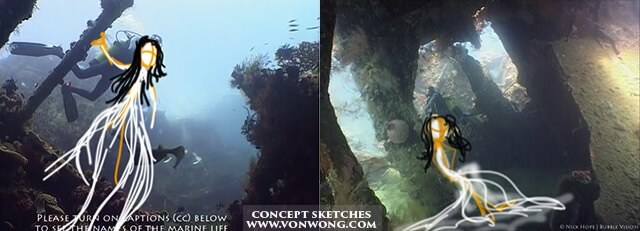 I took these ideas and presented them to Chris and I was already presented with my first challenge: The first rule in scuba is that you do not touch the coral reefs. Any contact would have to be implied, not actual. Right. Of course. We’d just have to make sure that we had foreground objects to imply any type of contact to help tell the story. Not a problem.
 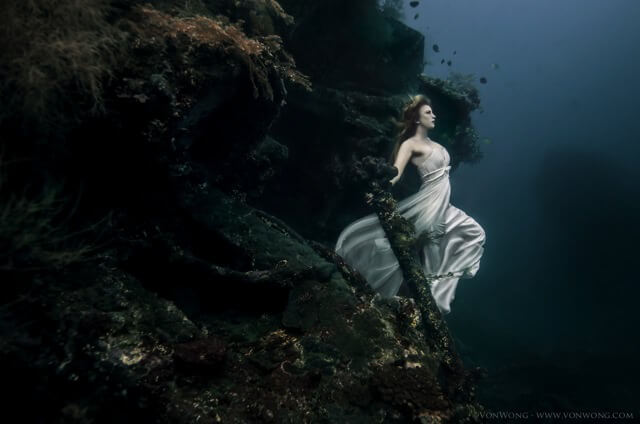 Nikon D90 | 12-24mm f4 | Aquatica housing | ISO 400 – f/4.0 – 1/200th sec Lighting I knew from past experience shooting in a swimming pool that lighting in the ocean was going to be no easy task. Thankfully, through conversations with Chris who also happened to be a pretty awesome photographer in his own right, I learned that I would be able to shoot at ISO 400, f4.0 and a minimum shutter speed of 1/50th across most of the shipwreck with nothing but ambient light alone, even at 30 meters depth. In regular english? Images that wouldn’t be blurry or excessively grainy despite the 5 year old Nikon D90 that I was using.
 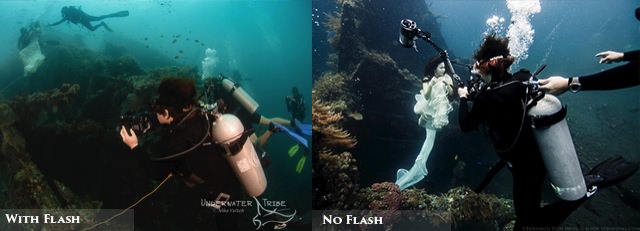 “But I saw you use some lights underwater in the video!” And you’re absolutely right! Mike Veitch had brought a set of strobes that I could use and I couldn’t help but try them out. Not only did they make my kit exponentially heavier and swimming more complicated, it would also give the images a “deer in the headlight” feeling where the foreground objects would be oddly brighter and properly coloured as opposed to the background objects.
 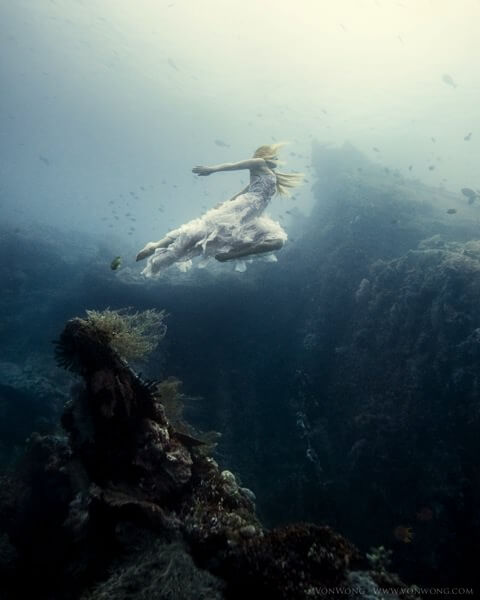 Nikon D90 | 12-24mm f4 | Aquatica housing | ISO 400 – f/4.0 – 1/500th sec Post-Production One of the challenges shooting underwater is that the deeper you get, the more desaturated everything gets. Thankfully, with a couple layers of color balancing (Color Balance, Curves, Selective Color), dodging and burning, and some careful masking, I was able to paint back color and tones into my image.
 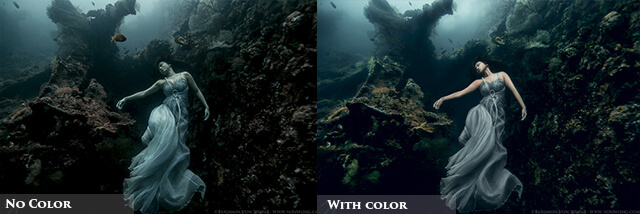 The secret? Time. Slowly painting in warmer yellow tones only on the arms and desaturating the dress so it remains clean and white.
 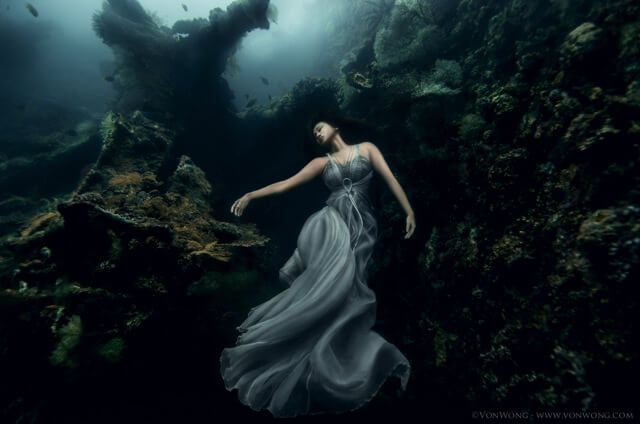 Nikon D90 | 12-24mm f4 | Aquatica housing | ISO 400 – f/4.0 – 1/320th sec
 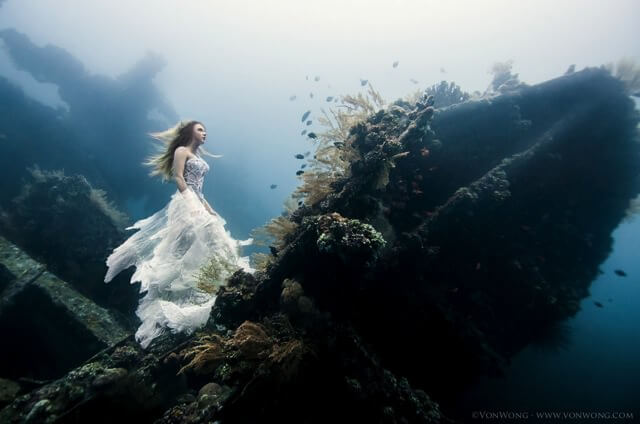 Nikon D90 | 12-24mm f4 | Aquatica housing | ISO 400 – f/4.0 – 1/100th sec – Available for SALE. All proceeds go to the Cure Sanfillipo Foundation to Save Eliza. In Conclusion: Nothing is impossible, everything just takes time to get through one piece at a time. Break any project down into bite size pieces and everything can be easily tackled. Be safe. Dream big. Interested in grabbing prints from the shoot? Click here. Credits:
- Produced by: Chris Simanjuntak
- Models: Nora Li, Camilla Argent
- Makeup: Yenny Gunawan
- Designer: Ali Charisma
- Cinematographer: Siva Shanker
- Assist: Sam Tsang and Sing Wong
- BTS Photos: Mike Veitch
Announcements: – On my way to Vietnam. If you want to hang out, join this group! If you missed last weeks video, check it out here:
Video by Siva Shanker
